 | |
| DSi-Camcorder |
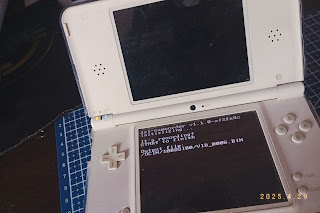
The Nintendo DSi is equipped with two cameras that serve as devices for shooting photos and other features (such as QR scans). Unfortunately, the built-in DSi application does not yet support video recording. A homebrew developer named Evie (EpicPkmn11 / PK11) managed to create a homebrew based on the DSi Camera homebrew that she created earlier. This homebrew actually records photos or images from frame to frame which will later be converted into videos via FFMPEG. In addition, of course, this homebrew does not record sound. To be able to do it, of course, you must first install FFMPEG and Python on your computer.
Materials:
- FFMPEG
- Python (Don't forget to install pip & pillow)
- DSi Camera & Camcorder
Steps :
- Install FFMPEG
- Install Python, then also install pip and pillow. After installing pip, you can type "pip install pillow" in the Python console to install pillow.
- Extract DSi-Camcorder (PK11) Backup.zip
- Copy the dsi-camera.nds and dsi-camcorder.nds files to your DSi SD card. The DSi Camera is used for taking pictures, while the camcorder is for recording. You can put them in the root of the SD card or in the /roms/ folder...
- Insert your SD card back into the DSi console. Then run the file dsi-camcorder.nds
- The video will be automatically recorded, press start to stop.
- If so, turn off the DSi console and insert your SD card back into your PC.
- Open the DCIM folder on your SD card, there will be a folder called ***DSI**, for example 100DSI00 etc.
- Open the folder and locate the VID_***.BIN file (e.g. VID_0001.BIN etc.).
- Copy the file to the same folder as the DSi-Camcorder (PK11) Backup.
- Rename the file to output.bin, then drag and drop it into the convert.py file.
- When the process is complete, there will be a folder with the name out and contains photos extracted from the .bin file.
- Next, you open FFMPEG in the folder that contains the out folder, not in the out folder. (The easiest way is to type cmd in the Windows explorer address bar).
- Copy-paste or type this code
ffmpeg -y -r 5 -i out/%04d.png out.mp4and wait for the conversion process to end.
The converted video will be displayed at 5 fps by default. If you cannot open the video that has been converted into mp4 earlier in the default media player or other, you must change the video fps to 30 fps. The trick is to use FFMPEG again. Type or copy-paste the following code
ffmpeg -i out.mp4 -r 30 weird.mp4
*Note:
out.mp4 you can replace according to the name of the video to be changed, while weird.mp4 is the output name of the video to be saved.
Source :
https://github.com/Epicpkmn11/dsi-camera/tree/camcorder
0 Comments:
Post a Comment